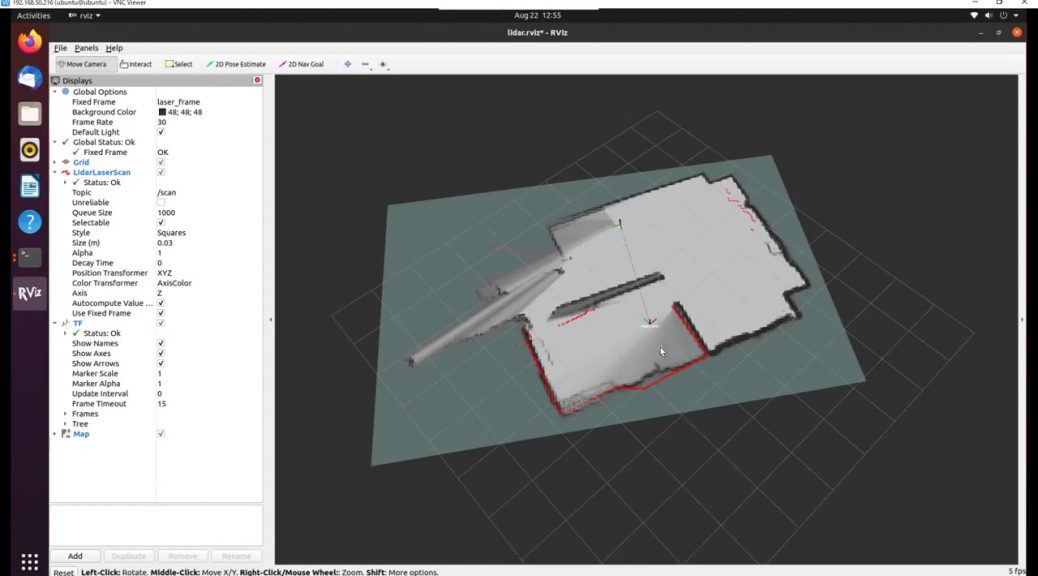
Raspberry Piとlidar(YDLIDAR X4)を使ってSLAMの環境を作ってみた。手持ちでRPi・Lidarを持って歩いてSLAM・地図の生成からシュミレーションを行うまで。
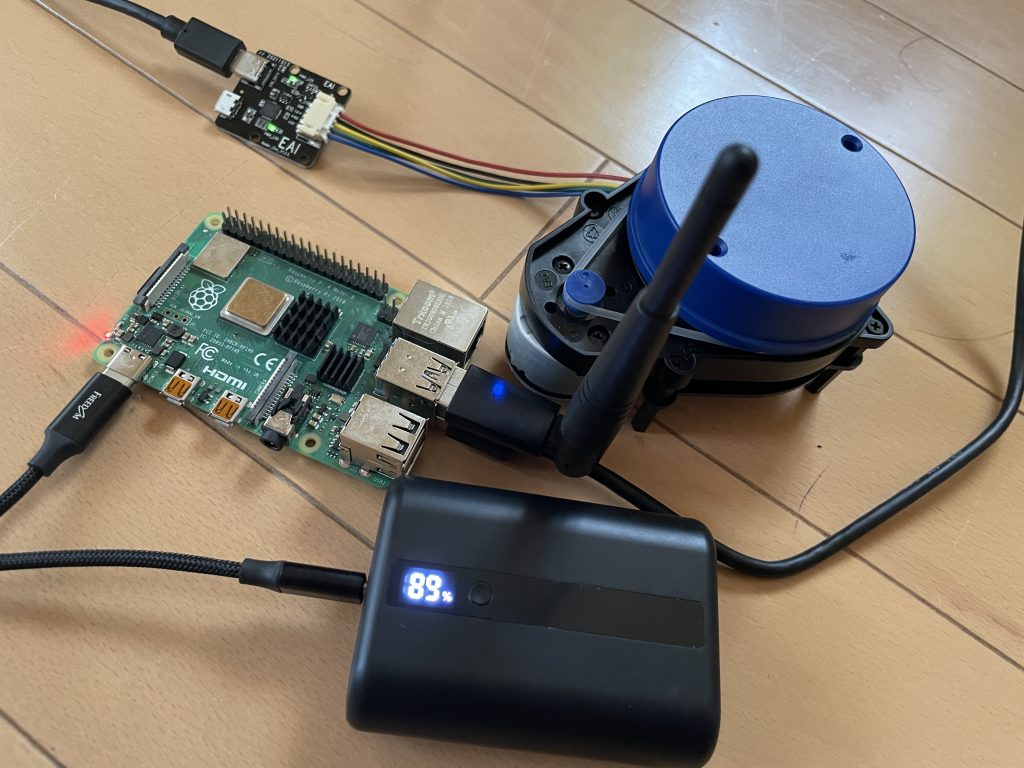
■ 環境
- Raspberry Pi 4 Model B 4Gbyte memory
- Ubuntu 20.04.5 LST/ROS Noetic
- YDLIDAR X4
- モバイルバッテリー(5V/3A出力)
- WiFi無線機子機
Raspberry Piについては昨今、かなり入手が困難な状況が続いている。メルカリで出品されている物も、2倍以上の価格だったり、入手が難しい。一体どこで入手できるのかしら….????
使いたいのに無いなー…という事をTLでつぶやいたら、HDMIが死んでいるRPi4を送って貰えることに。手持ちでRPi1〜4はあるものの、使っている物ばかりで、使えるもの1台も無いところに、世の中には神が居るものですね。
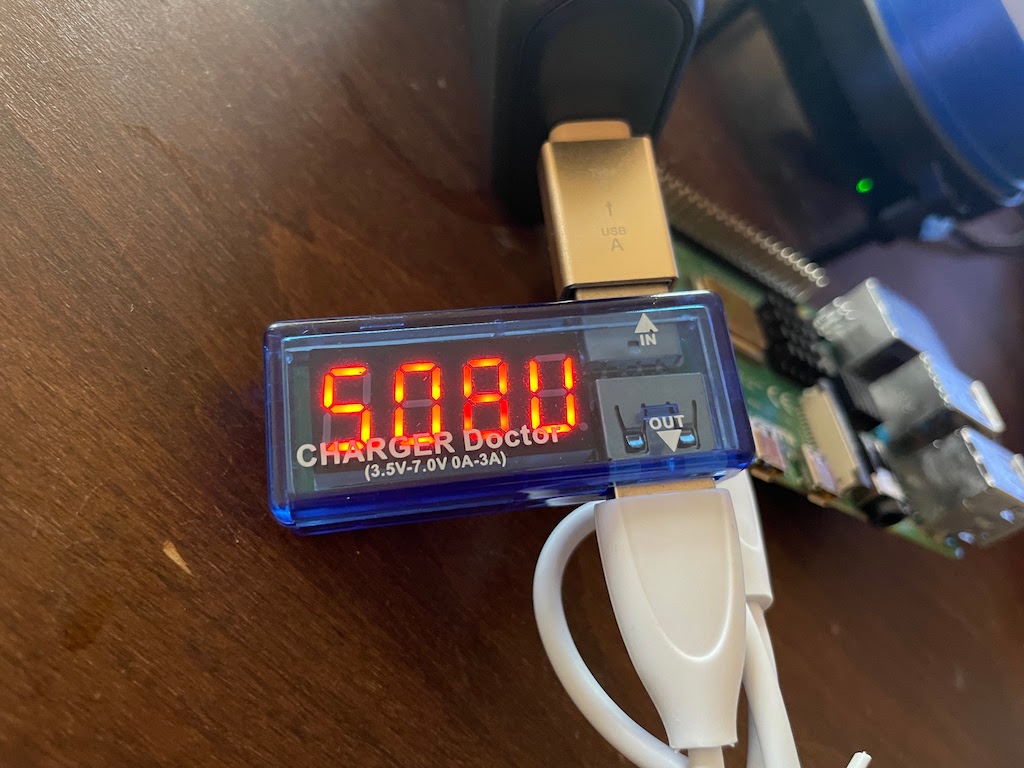
モバイルバッテリーは5V/3A出力できる物を使うことに。一応、WiFi・LIDAR・GPIO(TB6612FNG Dual Motor Driver: モーターはlipo外付けで)を同時に動かしてみても問題なかった。
WiFi無線子機は、RPi自体のWiFiは弱いので補強として使えればよき!!ということで、手持ちのがあったので使っている。
■ Ubuntuの設定
VNC経由でRPiを操作できるようにする。リモートでrvizの画面を確認したり、リモートが出来るとHDMI出力がなくても操作できるようになるので、何かと便利になる。
こちらの記事を参考にさせて頂きました。
・LTS Serverに “sudo apt-get install ubuntu-desktop” をインストール
・Setting => Sharing => Screen Sharing から”Allow connections to control the screen”にチェックを入れる
・Reuired a password を選択して、VNCから接続するときのパスワードを適宜設定しておく
・接続するNetoworkを設定しておく
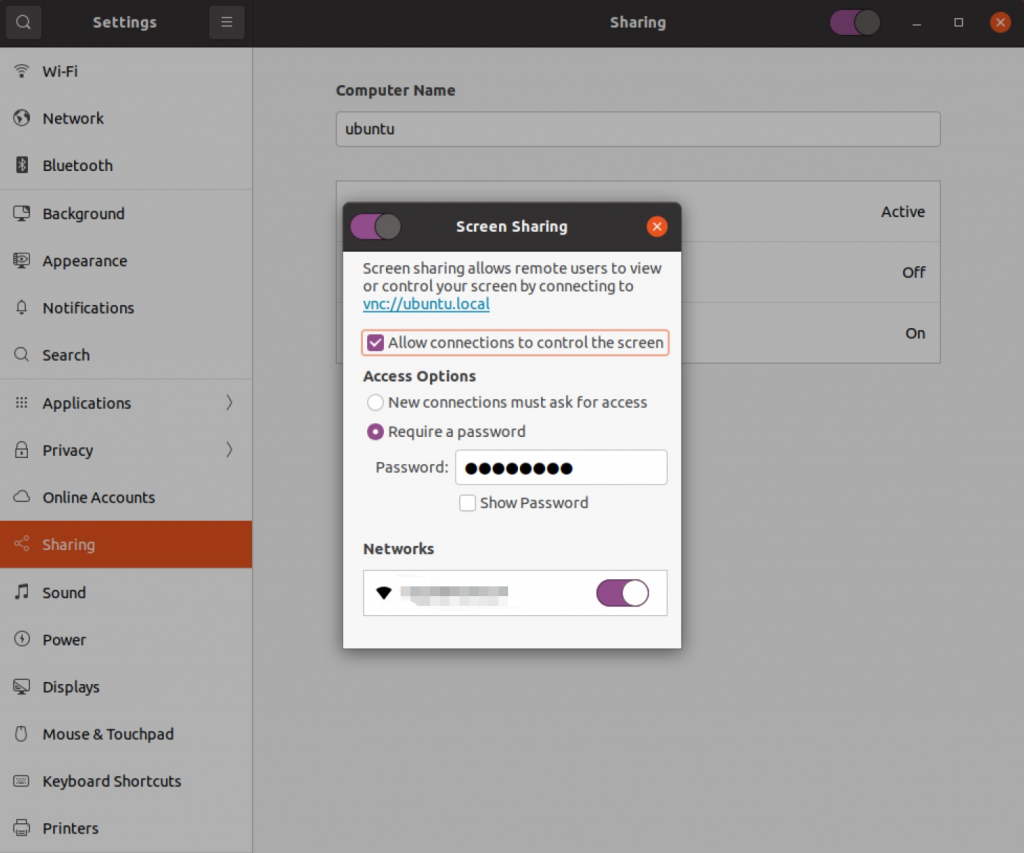
また、WindowsのVNC Viewerからアクセスするとき暗号化がされていると接続できないので、以下のUbuntuの画面共有の暗号化をオフにしておく。
sudo gsettings set org.gnome.Vino require-encryption falseつぎに、RPiはHDMIからディスプレイの解像度を取得しているとのことで、HDMI・ディスプレイ無しでVNC接続するために、ダミーのグラフィックドライバをインストールして設定しておく。
sudo apt install xserver-xorg-video-dummy
sudo tee /usr/share/X11/xorg.conf.d/80-dummy.conf <<EOF
Section "Device"
    Identifier  "Configured Video Device"
    Driver      "dummy"
    VideoRam 256000
EndSection

Section "Monitor"
    Identifier  "Configured Monitor"
    HorizSync 5.0 - 1000.0
    VertRefresh 5.0 - 200.0
    # 1920x1080 59.96 Hz (CVT 2.07M9) hsync: 67.16 kHz; pclk: 173.00 MHz
    Modeline "1920x1080_60.00"  173.00  1920 2048 2248 2576  1080 1083 1088 1120 -hsync +vsync
EndSection

Section "Screen"
    Identifier  "Default Screen"
    Monitor     "Configured Monitor"
    Device      "Configured Video Device"
    DefaultDepth 24
    SubSection "Display"
        Depth 24
        Modes "1920x1080"
    EndSubSection
EndSection

Section "InputClass"
    Identifier "system-keyboard"
    MatchIsKeyboard "on"
    Option "XkbLayout" "jp,us"
    Option "XkbModel" "jp106"
    Option "XkbVariant" ",dvorak"
    Option "XkbOptions" "grp:alt_shift_toggle"
EndSection
EOF
これでVNCでリモート接続環境ができあがり。一旦、RPiを再起動してHDMI接続無しでVNC接続できることを確認しておく。
■ ROS Noeticのインストール
次にROSの環境構築を行う。こちらの記事を参考にさせて頂きました。サクッとインストールで自分の場合は放置して気づいたら終わっていた。
# リポジトリの登録
sudo sh -c 'echo "deb http://packages.ros.org/ros/ubuntu $(lsb_release -sc) main" > /etc/apt/sources.list.d/ros-latest.list'
sudo apt install curl  -y
curl -s https://raw.githubusercontent.com/ros/rosdistro/master/ros.asc | sudo apt-key add -

# ROS のインストール、ナビゲーション関係のパッケージも同時に
sudo apt update
sudo apt install ros-noetic-desktop-full -y
sudo apt-get -y install ros-noetic-navigation ros-noetic-move-base

# パッケージ類の依存関係をいい感じにしてくれるrosdepの初期化
sudo apt-get install python3-rosdep -y
sudo rosdep init
rosdep update

# 環境変数・パスの追加
echo "source /opt/ros/noetic/setup.bash" >> ~/.bashrc
source ~/.bashrc
source /opt/ros/noetic/setup.bash

# ビルドで必要になるcatkinのインストール
sudo apt-get -y install python3-rosinstall
sudo apt-get install -y python3-catkin-tools
■ YDLIDAR SDK/ドライバのインストール
YDLIDARの環境整備で、SDK・ドライバ類をインストールしていく。
YDLidar-SDK、ydlidar_ros_driver の順でインストールして動作確認していく。書いてある通りにインストールすれば良い感じ。
# YDLIDAR SDKからインストール
# 作業ディレクトリは"$HOME/work"以下を想定
sudo apt-get install swig -y
sudo apt-get install python3-pip -y

mkdir $HOME/work
cd $HOME/work
git clone https://github.com/YDLIDAR/YDLidar-SDK.git
mkdir YDLidar-SDK/build
cd YDLidar-SDK/build
cmake ..
make
sudo make install

# YDLIDAR ROS Driverのビルド
mkdir -p $HOME/work/ydlidar_ws/src/
cd $HOME/work/ydlidar_ws/src/
git clone https://github.com/YDLIDAR/ydlidar_ros_driver.git
cd $HOME/work/ydlidar_ws
catkin_make

# 環境変数に追加
echo "source $HOME/work/ydlidar_ws/devel/setup.bash" >> ~/.bashrc
source ~/.bashrc

# udevに追加(/dev/ydlidar を使えるようにする)
chmod 0777 src/ydlidar_ros_driver/startup/*
sudo sh src/ydlidar_ros_driver/startup/initenv.sh
ここまでやったら、あとは動作確認ですね。X4 lidarをRPi4に接続して、VNCで接続してそれぞれ立ち上げていきます。
# 左上のターミナル
roscore
# 左下のターミナル
roslaunch ydlidar_ros_driver X4.launch
# 右上のターミナル
rviz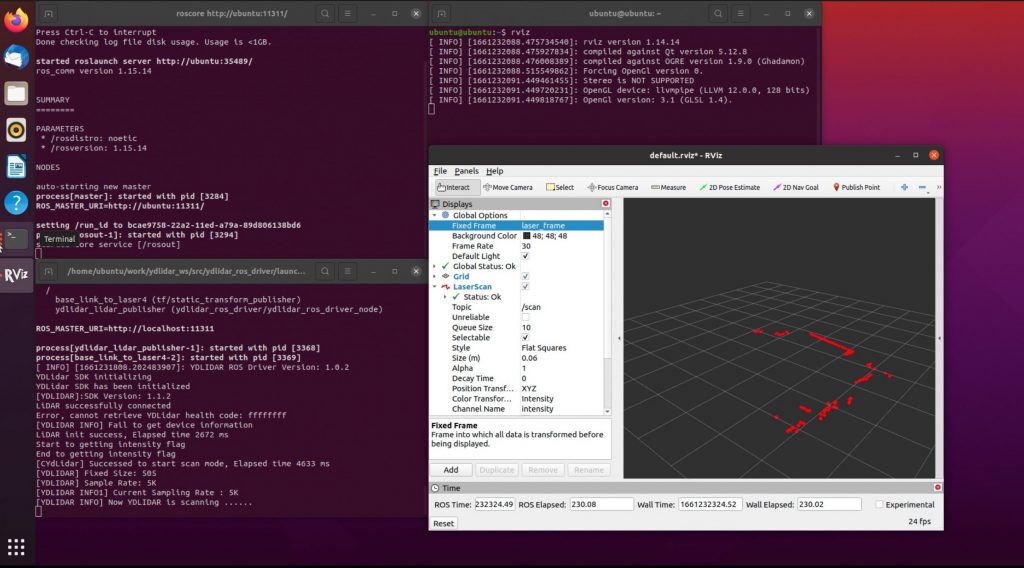
rvizの左下の”Add”から”By topic”タブの、/scan LaserScan を選択。
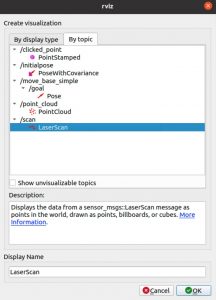
あとは、左のパネルから
“Global Options” => “Fixed Frame” を”base _footprint” or “laser_frame” を選択
“LaserScan” => “Size (m)” を 0.06 とかに設定
すると、lidarでスキャンした点が表示されますね。これでlidar側の準備はとりあえず完了で、次はSLAMの環境を用意していく。
■ cartographerのビルド
cartographerはGoogleが公開しているSLAMパッケージですね。これをRPi4上でビルドしていきます。
sudo apt-get update
sudo apt install ninja-build stow -y
cd
mkdir catkin_ws
cd catkin_ws
wstool init src
wstool merge -t src https://raw.githubusercontent.com/cartographer-project/cartographer_ros/master/cartographer_ros.rosinstall
wstool update -t src

sudo rosdep init
rosdep update
rosdep install --from-paths src --ignore-src --rosdistro=${ROS_DISTRO} -y
# ここで100%コケます。libabsl-dev の依存関係が解決できないというエラーで以下が表示されると思います。
# ERROR: the following packages/stacks could not have their rosdep keys resolved to system dependencies:
# cartographer: [libabsl-dev] defined as "not available" for OS version
# そこで以下のコマンドを実行してlibabsl-devの行を削除して、再度、rosdistro install を実行
sed -i -e '/libabsl\-dev/d' src/cartographer/package.xml

# cartographer用のコンパイラ、abseil-cpp をインストール
# 5分程度で終わりました。
src/cartographer/scripts/install_abseil.sh

####
# pythonのバージョンを変更
# ビルド時にpythonのデフォルトが2.7だと失敗します。そこで、update-alternatives コマンドでデフォルトのバージョンを3.8にします。
# 既にデフォルトが3.8の場合は飛ばしてOK、3.8、2.7を登録する
sudo update-alternatives --install /usr/bin/python python /usr/bin/python2.7 1
sudo update-alternatives --install /usr/bin/python python /usr/bin/python3.8 1

# update-alternatives で python 3.8 を選択する
sudo update-alternatives --config python
There are 2 choices for the alternative python (providing /usr/bin/python).

  Selection    Path                Priority   Status
------------------------------------------------------------
  0            /usr/bin/python2.7   1         auto mode
* 1           /usr/bin/python3.8   1         manual mode

Press <enter> to keep the current choice[*], or type selection number: 1
####

# cartographer をninjaでビルド
# makeでビルドすると、RPi4上ではコンパイルでスワップを起こしてビルドが止まったり失敗します。
# 上手い手順もあると思いますが、手順通りninjaでビルドします。
# 巨大なビルドなので他のプロセス&アプリは落としておいた方が良いです。1時間くらいはかかるので、放置しておきましょう。
# また、途中でビルドが止まって動かなくなる事があります。その場合はランレベルをsudo systemctl set-default multi-userに変えて、余計なプロセスを落としてビルドします。
catkin_make_isolated --install --use-ninja
source install_isolated/setup.bash
echo "source $HOME/catkin_ws/install_isolated/setup.bash" >> ~/.bashrc
次にros用の起動・設定ファイルを作成します。こちらの記事を参考にさせて頂きました。
/home/ubuntu/catkin_ws/install_isolated/share/cartographer_ros/launch/ydlidar_2d.launch を編集
<?xml version="1.0" ?>
<launch>
  <node name="ydlidar_lidar_publisher"  pkg="ydlidar_ros_driver"  type="ydlidar_ros_driver_node" output="screen" respawn="false" >
    <!-- string property -->
    <param name="port"         type="string" value="/dev/ydlidar"/>
    <param name="frame_id"     type="string" value="laser_frame"/>
    <param name="ignore_array"     type="string" value=""/>

    <!-- int property -->
    <param name="baudrate"         type="int" value="128000"/>
    <!-- 0:TYPE_TOF, 1:TYPE_TRIANGLE, 2:TYPE_TOF_NET -->
    <param name="lidar_type"       type="int" value="1"/>
    <!-- 0:YDLIDAR_TYPE_SERIAL, 1:YDLIDAR_TYPE_TCP -->
    <param name="device_type"         type="int" value="0"/>
    <param name="sample_rate"         type="int" value="5"/>
    <param name="abnormal_check_count"         type="int" value="4"/>

    <!-- bool property -->
    <param name="resolution_fixed"    type="bool"   value="true"/>
    <param name="auto_reconnect"    type="bool"   value="true"/>
    <param name="reversion"    type="bool"   value="false"/>
    <param name="inverted"    type="bool"   value="true"/>
    <param name="isSingleChannel"    type="bool"   value="false"/>
    <param name="intensity"    type="bool"   value="false"/>
    <param name="support_motor_dtr"    type="bool"   value="true"/>
    <param name="invalid_range_is_inf"    type="bool"   value="false"/>
    <param name="point_cloud_preservative"    type="bool"   value="false"/>

    <!-- float property -->
    <param name="angle_min"    type="double" value="-180" />
    <param name="angle_max"    type="double" value="180" />
    <param name="range_min"    type="double" value="0.1" />
    <param name="range_max"    type="double" value="12.0" />
    <!-- frequency is invalid, External PWM control speed -->
    <param name="frequency"    type="double" value="10.0"/>
  </node>

  <node
     pkg="tf"
     type="static_transform_publisher"
     name="base_link_connect"
     args="0 0 0 0 0 0 /base_link /laser_frame 100"
  />

  <node
    name="cartographer_occupancy_grid_node"
    pkg="cartographer_ros"
    type="cartographer_occupancy_grid_node"
    args="-resolution 0.05"
  />
  <node
    name="cartographer_node"
    pkg="cartographer_ros"
    type="cartographer_node"
    args="-configuration_directory $(find cartographer_ros)/configuration_files -configuration_basename ydlidar_2d.lua"
    output="screen">
  </node>

  <node
    name="rviz"
    pkg="rviz"
    type="rviz"
    required="true"
    args="-d $(find ydlidar_ros_driver)/launch/lidar.rviz"
  />
</launch>
/home/ubuntu/catkin_ws/install_isolated/share/cartographer_ros/configuration_files/ydlidar_2d.lua を編集
include "map_builder.lua"
include "trajectory_builder.lua"

options = {
  map_builder = MAP_BUILDER,
  trajectory_builder = TRAJECTORY_BUILDER,
  map_frame = "map",
  tracking_frame = "base_link",
  published_frame = "base_link",
  odom_frame = "odom",
  provide_odom_frame = false,
  publish_frame_projected_to_2d = false,
  use_odometry = false,
  use_nav_sat = false,
  use_landmarks = false,
  num_laser_scans = 1,
  num_multi_echo_laser_scans = 0,
  num_subdivisions_per_laser_scan = 1,
  num_point_clouds = 0,
  lookup_transform_timeout_sec = 0.2,
  submap_publish_period_sec = 0.3,
  pose_publish_period_sec = 5e-3,
  trajectory_publish_period_sec = 30e-3,
  rangefinder_sampling_ratio = 1.,
  odometry_sampling_ratio = 1.,
  fixed_frame_pose_sampling_ratio = 1.,
  imu_sampling_ratio = 1.,
  landmarks_sampling_ratio = 1.,
}

MAP_BUILDER.use_trajectory_builder_2d = true

TRAJECTORY_BUILDER_2D.min_range = 0.
TRAJECTORY_BUILDER_2D.max_range = 10.
TRAJECTORY_BUILDER_2D.missing_data_ray_length = 5.
TRAJECTORY_BUILDER_2D.use_imu_data = false
TRAJECTORY_BUILDER_2D.use_online_correlative_scan_matching = true

POSE_GRAPH.constraint_builder.min_score = 0.65
POSE_GRAPH.constraint_builder.global_localization_min_score = 0.7

POSE_GRAPH.optimization_problem.local_slam_pose_translation_weight = 1e5
POSE_GRAPH.optimization_problem.local_slam_pose_rotation_weight = 1e5
POSE_GRAPH.optimization_problem.odometry_translation_weight = 1e5
POSE_GRAPH.optimization_problem.odometry_rotation_weight = 1e5
POSE_GRAPH.optimization_problem.huber_scale = 1e3

TRAJECTORY_BUILDER_2D.ceres_scan_matcher.occupied_space_weight = 10
TRAJECTORY_BUILDER_2D.ceres_scan_matcher.rotation_weight = 40

TRAJECTORY_BUILDER_2D.submaps.num_range_data = 120
TRAJECTORY_BUILDER_2D.motion_filter.max_distance_meters = 0.1
TRAJECTORY_BUILDER_2D.motion_filter.max_angle_radians = math.rad(0.2)

return options
■ SLAM・地図の作成
準備が終わったので実行します。
# 左上のターミナル
roscore
# 左下のターミナル
roslaunch cartographer_ros ydlidar_2d.launch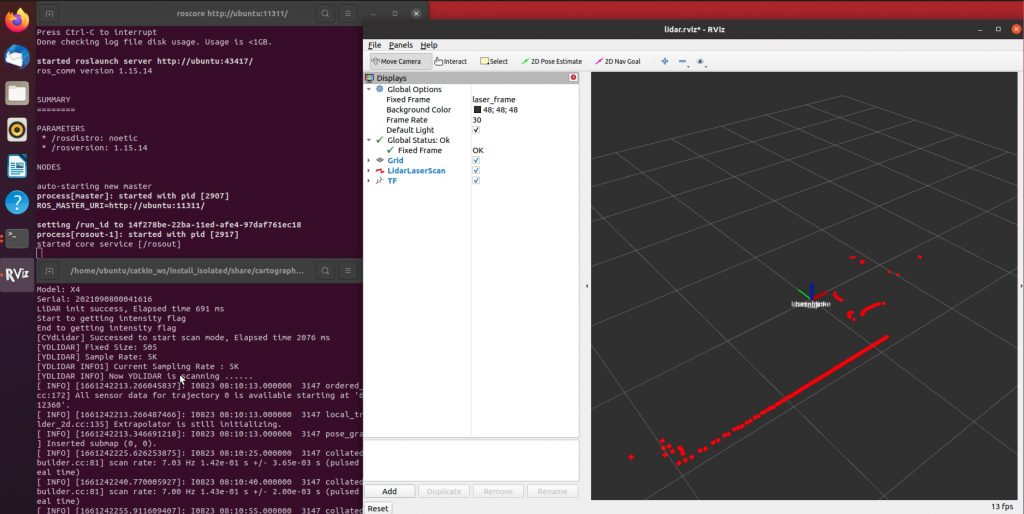
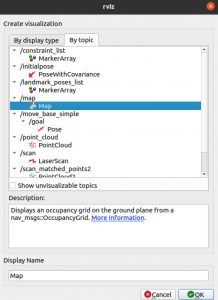
rvizのコンパネから”Add”=>”By topic”=>Mapを選択する。
■ 地図の保存
出来た地図の保存はmap serverで行う。保存した地図は、同じくmap serverを使って配信する。
■ 3Dモデルでシュミレーション
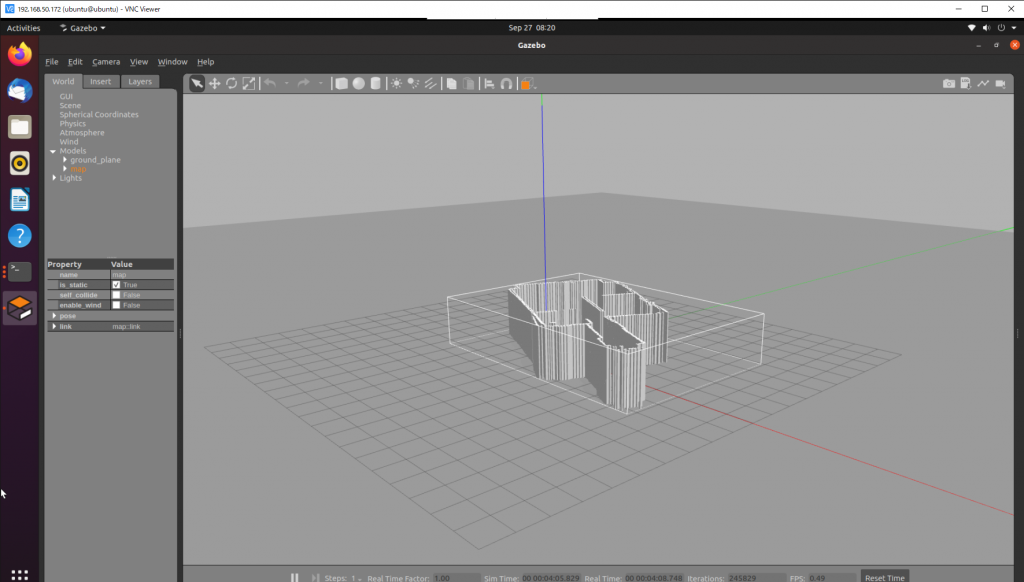
シュミレーションはgazeboを使う。ここで、gazebo用にSTLのモデルを生成するわけで、便利なmap2gazeboがあったので、このまま使ってみる。mapについてはmap serverでpublishしたままに。
こちらを参考にさせていただきました。
■ Turtlebot3でnavigation
地図とシュミレーション環境が出来たので、Turtlebo3でナビゲーションしてみます。
RPi4のスペックだと、かなりもっさりとした動きになるので、PC環境で行います。またROSの環境を作るのは面倒なので、Docker/VNCを利用します。ブラウザで利用できるので、めちゃくちゃ便利ですね。
docker run -p 6080:80 --shm-size=2048m tiryoh/ros-desktop-vnc:noeticrviz/gazeboで動作させると
実際にロボットをlidarで測定した環境で動作させることが出来ました。ROSの先達さん達に感謝です。
